I got the AWI collection out the other day and decided to refight one of the battles that struck me as being a little different to the many of the other I’ve refought in the past( Click on AWI link on the right hand side!)
I settled on Bennington 16th August 1777 and used the Scenario Booklet 4 from the British Grenadier rules, but decided to try the Little Wars TV rules, “Live Free or Die” as I have watched their games on YouTube and was impressed with the way they played. I used the OOB in the scenario book and just divided the number of figures by 4 to get the appropriate number of bases. For skirmish units I divided the number of figures required by 2 ( see below).
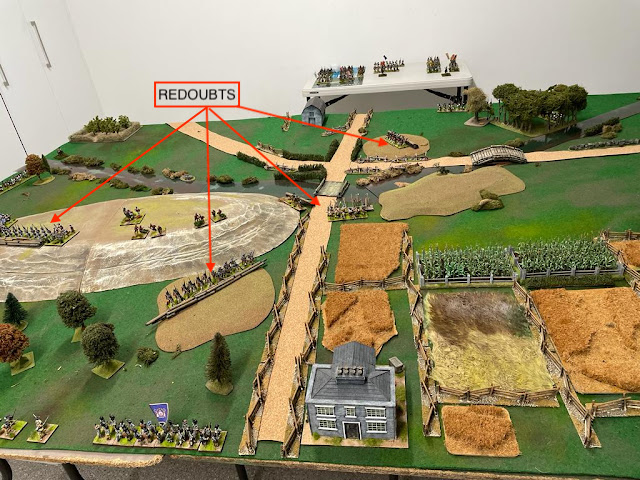
What particularly grabbed me about the fight was two interesting ingredients. The first was that the Continentals ( well- militia mainly) are assaulting defensive redoubts instead of the usual attacking redcoats. The second aspect was the fact that on the ‘redcoat’ side there are few actual British troops. The vast bulk are Brunswickers, Loyalists and some Indians…so hardly any ‘redcoats’…just a few riflemen!
 |
| The table- looking north. |
One of the Brunswick units was in fact dismounted dragoons who had no horses and historically launched a bayonet ( read: sabre) charge against the Patriot forces. I actually didn’t have any proper Brunswick dragoons for some of Baum's command so just used some of my Hessians.
The scenario booklet called for two separate tables, but I decided to cheat and created one long 12' x 6'. Breyman's relief column would not arrive on the southern table edge until turn 10 and had a long way to go.
I won't give you all the historical details- the scenario book has it all!
 |
Northern end of the table.
|
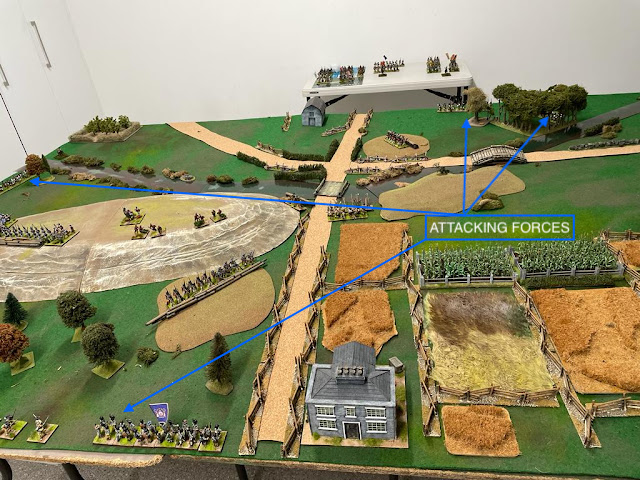
Below is the same pic but with the key troops deployments highlighted.
 |
| Southern redoubt with Queen's loyal rangers covering the first bridge crossing.- commanded by Chris. |
 |
| Nicholl's New Hampshire militia advancing against the northern redoubt- commanded by Richard. |
 |
| The northern redoubt- atop the big hill. British 'Corp of Select Markmen' in front- Commanded by Ross. |
 |
| Indians- fighting for the Crown- commanded by Ross. |
 |
| Vermont rangers skirmishing with Indians, near the western redoubt- Commanded by Ralph, who doubled up as the American commander John Stark. |
 |
| Vermont Rangers , in close formation ( flag not the right one!) |
 |
| Nicholl's militia advancing from both sides of the main redoubt. |
 |
| Hobart's NH Militia (Spyros) in a firefight with the Queen's Loyal rangers (Chris) in the southern redoubt. |
 |
| John Starks' NH Reserve arrive- four Units of Militia. |
 |
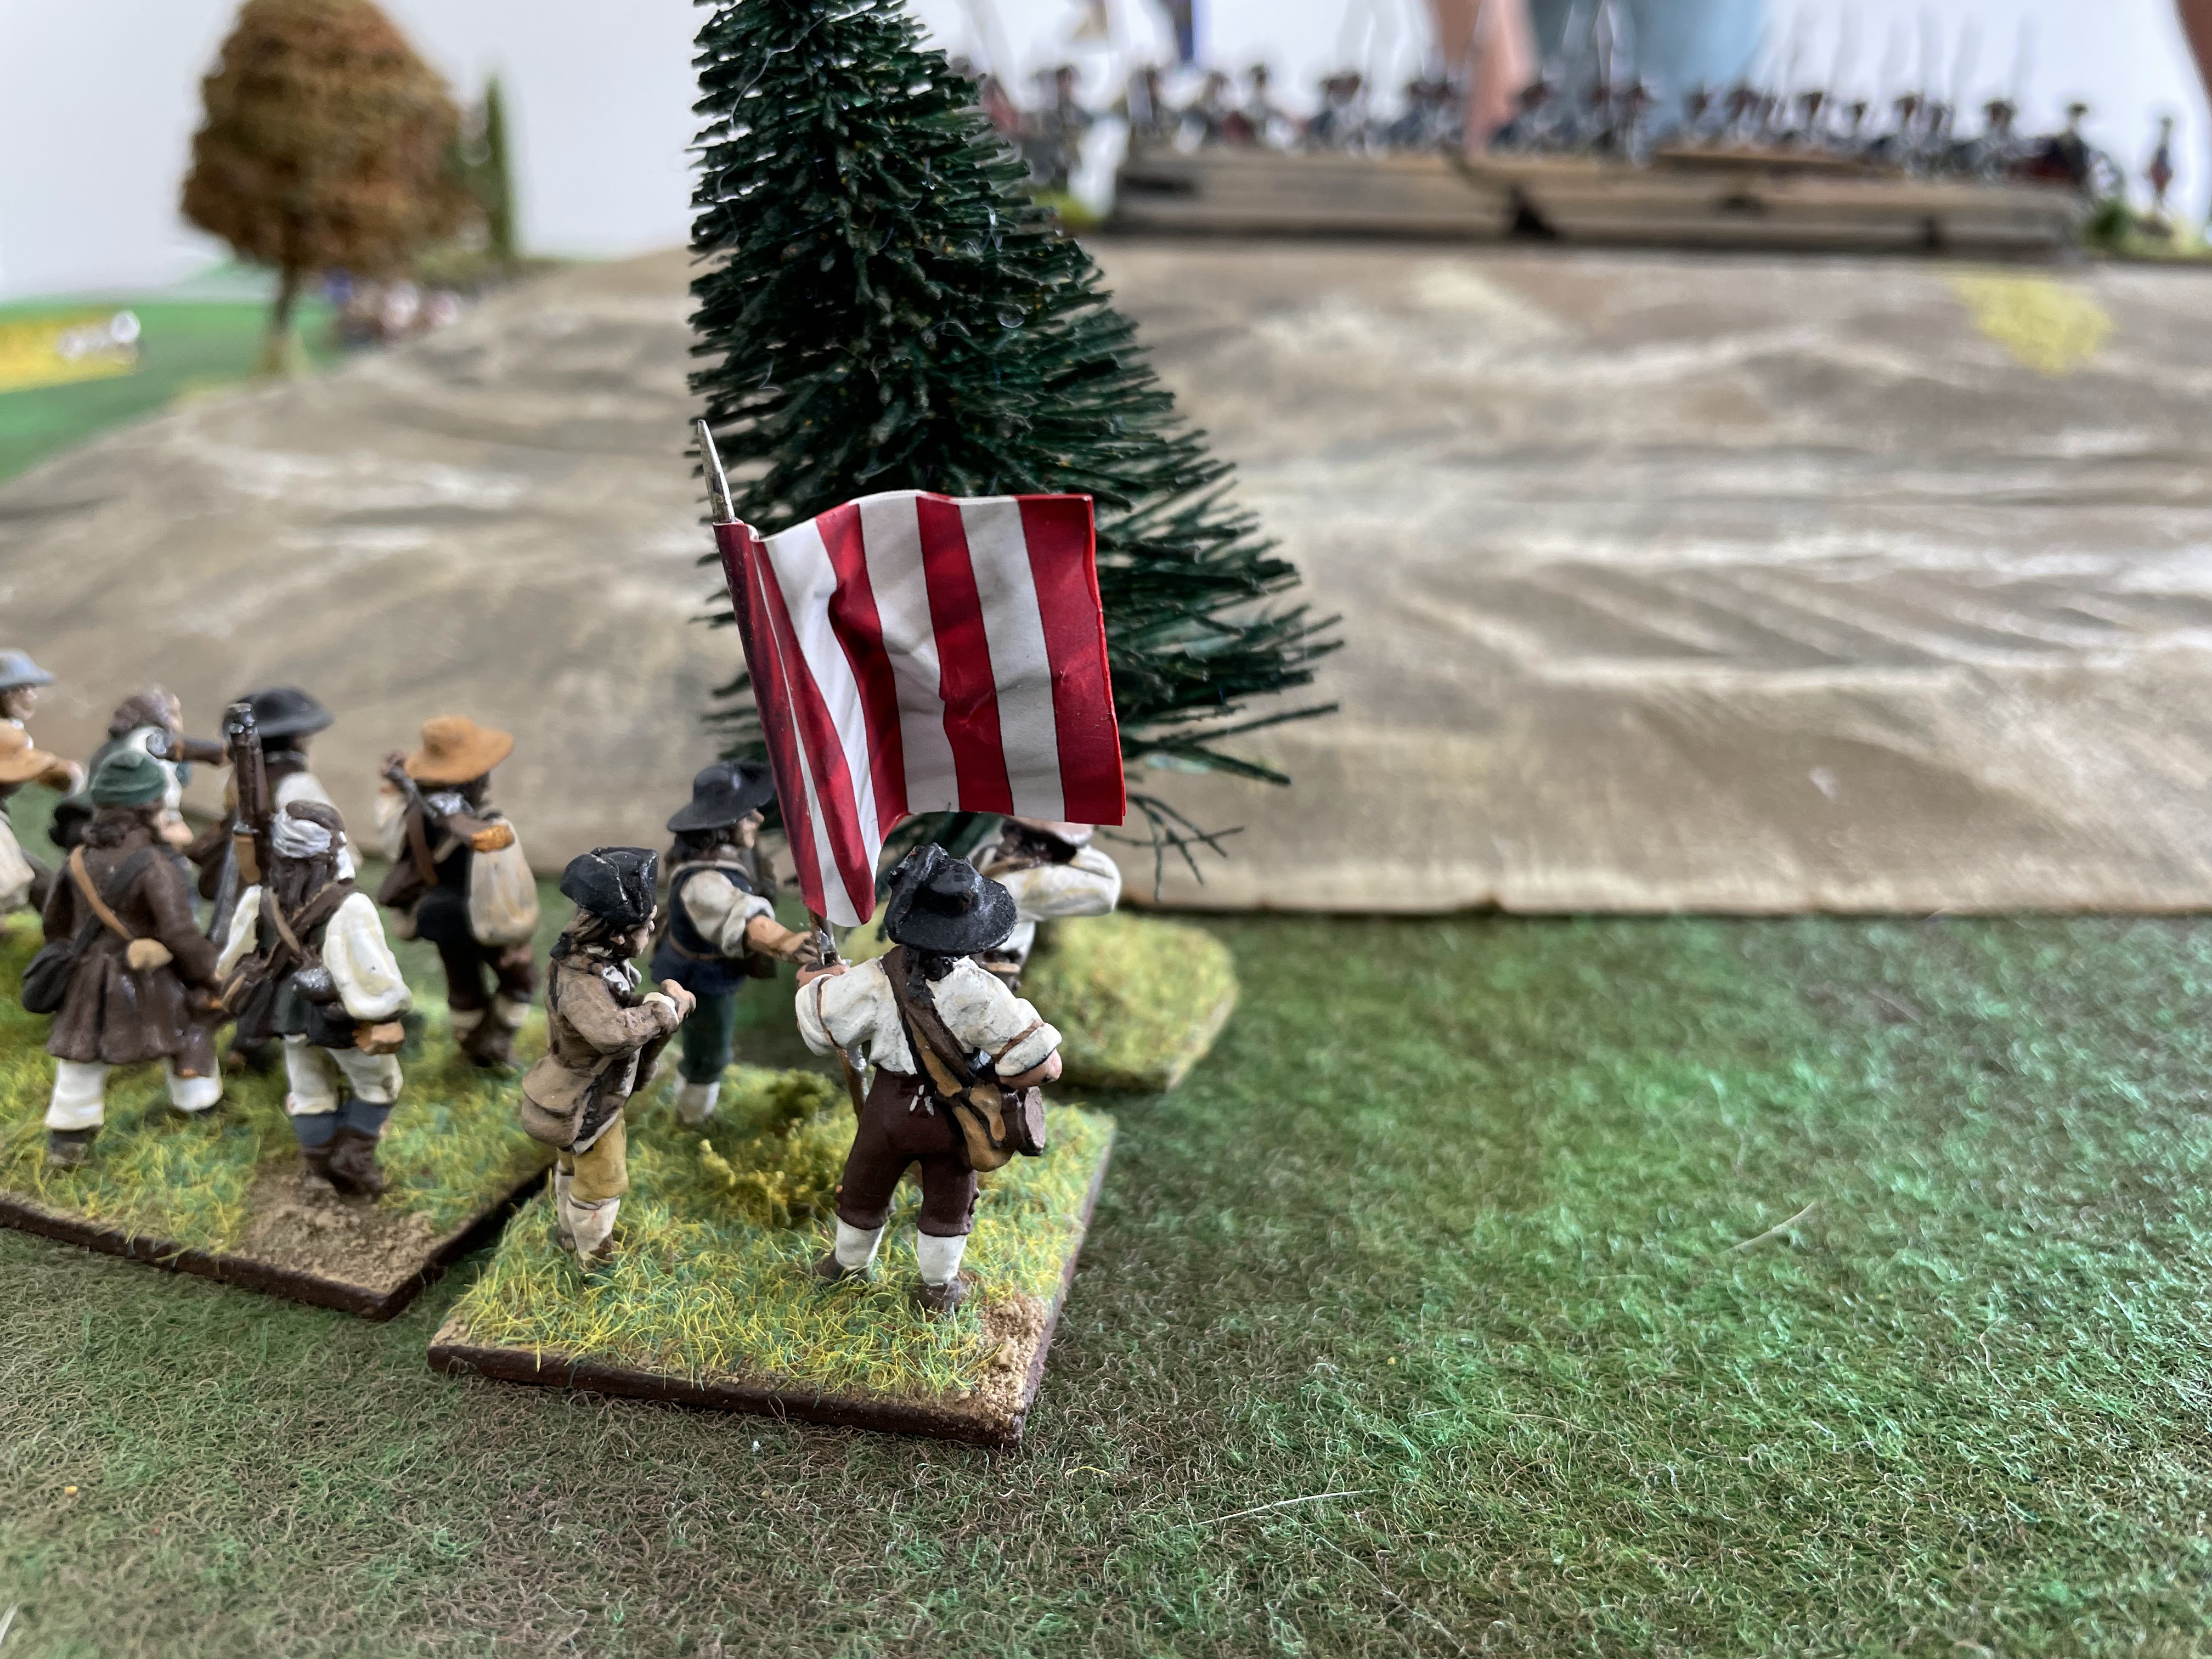
| Vermont Rangers skirmishing. They were known as the Green Mountain Boys- I didn't have any proper figures so used some of my Virginia Riflemen...I know, I know, sacrilege, disgrace, poor form etc etc..... |
 |
My Gen. Washington figure doubling as a militia commander...........
"How low can you sink to play a game??" I hear you scream....go away.
The Blue marker is for Command Points- Live Free or Die required command points to be allocated in the first phase of the turn- the 1 allocated hear means that the troops are able to move forward. |
 |
| The northern redoubt under pressure. Ross defended the position valiantly but was eventually overrun. He did better than Baum- holding out longer. |
 |
| The Canadian militia in the central redoubt watching as NH militia engaged the Queen's Rangers in the southern redoubt. |
 |
| Lt Col. Heinrich Breyman's relieving column- Grenadiers in the lead, artillery following- a small but powerful force...but they arrived too late to save Baum's forces. |
 |
| Later stages of the game- northern redoubt is nearly overrun- the western redoubt is holding as is the central redoubt. The southern one is totally surrounded and about to fall...as Breyman's relief column arrives. |
 |
| Hobart's Militia ( Spyros) holding the southern bridge as the Brunswick Grenadiers arrive. |
 |
| Stark's reserve begin to take up positions to halt the relief column. |
 |
| New Hampshire Militia looking across the bridge at the loyalist Canadian Militia. |
 |
| NH Militia on the hill in a fire fight with Brunswickers in the main redoubt ( I know - the flag is not New Hampshire!) |
 |
The final act- as the German relief column begins to deploy to deal with the Rebels, the northern positions collapse.....The rebels win.
|
A fun game that was played over 3-4 hours using the Live Free or Die rules. They are easy to learn with 5 players ( Americans : Ralph, Spyros and Richard ) ( British: Ross and Chris) and an umpire ( me!).
Being lazy here- rather than type out the OOB- I just took a pic of the ones in Scenario Book 4 of British Grenadier. I hope I haven't breached any copyright rules.


.jpeg)


John, your Bennington is an outstanding presentation. From table, terrain, troops, battle account, and photography, all are superbly executed. A Rebel win? Icing on a very delicious looking cake!
ReplyDeleteThanks JF! It was a fun afternoon.
ReplyDeleteBrilliant afternoon's entertainment thanks John.
ReplyDeleteThanks Rich. Another one soon I hope!
ReplyDeleteWow, what a great report John, with most beautiful terrain and figures, I do like the militia!
ReplyDeleteThanks Phil- I like them too!!
DeleteCraker of a game and easy flowing rules.
ReplyDeleteThanks Spyros- glad you enjoyed it! Yes the rules are great too!
DeleteWhat is the terrain mat you are using?
ReplyDeleteHi- it's just a piece of marine carpet from Bunnings hardware.
Delete