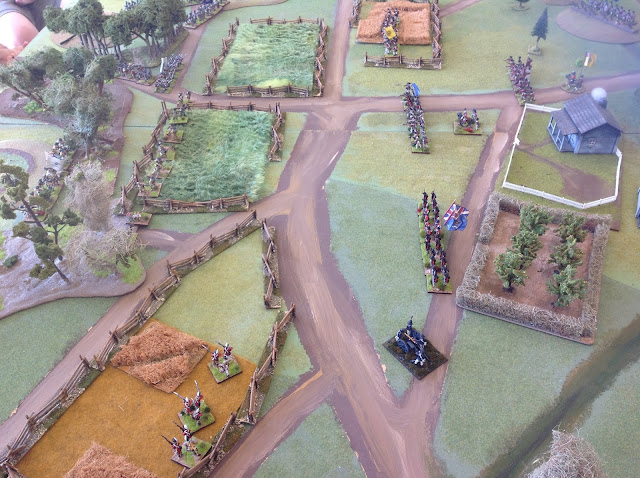
After the
success of Guildford Courthouse (see previous blog) I decided to give Freeman’s
farm a go. This saw the Americans under Benedict Arnold on the attack in an attempt
to beat ‘Gentleman’ Johnny Burgoyne. The British had one Brigade in the middle
of the table ( Hamilton’s- Richard), one brigade in the earth works on the left flank (
Fraser’s- Ralph ) and one brigade ( Reidesel’s Hessians- Richard II ) to arrive with a randomised
dice throw.
The
Americans also had three brigades and two ( Morgans -Phil and Poor's -Chris ) were on the
table. The third ( Learned’s- Liam ) would arrive very quickly to help destroy
Hamilton’s brigade and secure the victory. Well, that was the plan….
Richard, who was in charge of the Hessians rolled the D10 for the first turn of the day. Well he rolled a '10' didn't he?- And that was the 10% chance that the Hessians would arrive early- and they basically turned up hours before they did historically. The other caveat that was broken was Fraser's brigade ( Ralph) who, in 1777 spent most of the battle watching from their entrenchments. Not this time- their timing was based on the Hessians- by turn 3 every British unit on the table was advancing towards the Americans- who were still struggling to deploy effectively!!! ( You can see where this is going!!)
DAMN! Well it was a good game- the Americans ( Chris, Liam, Phil, and me) fought well, but had no answer to the better trained advancing redcoats. So history was changed, Benedict Arnold got himself beaten- and would that mean the French would not join the Patriot cause? Well no idea- but we enjoyed ourselves!!
 |
| Fraser's Brigade- The 24th Foot , with guns, light infantry behind- waiting in the entrenchments. |
 |
| 3rd New York with artillery support |
 |
| The right of the British line- Light Bobs and artillery |
 |
| Morgan's Virginia Riflemen- they caused some serious problems for the Redcoats! |
 |
| Morgan's Virginia Riflemen |
 |
| Continental Reinforcements! |
 |
| Learned's Brigade |
 |
| Dearborn's Infantry |
 |
| Hamilton's Brigade- waiting. |
 |
| Still waiting. |
 |
| They look good- while waiting! |
 |
| The Patriot troops begin to arrive in force. |
 |
| Tory skirmishers- supporting the Light Bobs. |
 |
| Advancing Americans- the Light Infantry defending a fence line. |
 |
| The 'Hessians' arrive!!! |
 |
| Three regiments...enough to turn the tide. |
 |
| The last firefight of the game- New Hampshire and New Yorkers vs advancing Redcoats......the Redcoats carried the day. |


Great looking game with wonderfully painted figures and tabletop.
ReplyDeleteThanks Peter! Appreciate the comments!
DeleteSuperb spectacle. It provides some great insight re-fighting this one. Always a different result when we do it. Great to read and see this.
ReplyDeleteThank you! Yes it does- the fact that the British got moving made the difference- a really interesting version of the past.
DeleteAwesome set up as always.
ReplyDeleteThanks Spyros!!
DeleteExcellent report, very much enjoyed reading that. Can you explain where the entrenchments on the British right come from? Were you using the British Grenadier Scenario books by any chance? From memory, they have Fraser's command in entrenchments, but that is wrong - there were none at that stage in the campaign; in fact, the 24th charged and dispersed Morgan's command just after the latter had shot up Forbes' pickets in front of Hamilton's Brigade.
ReplyDeleteAll the best, Brendan Morrissey
Hi Brendan, thank you for looking in- yes I used the British Grenadier Scenario booklet- W.J. Wood in his book "Battles of the Revolutionary War" doesn't mention them, nor does any other book I have- but the Scenario book does- so I Included them in the off chance the writers had info that I had not come across.
ReplyDeleteHugely enjoyed - thanks
ReplyDeleteThank you!
Delete